Volkswagen Golf Service & Repair Manual: Removing and installing shock absorber, multi-link suspension, right shock
absorber
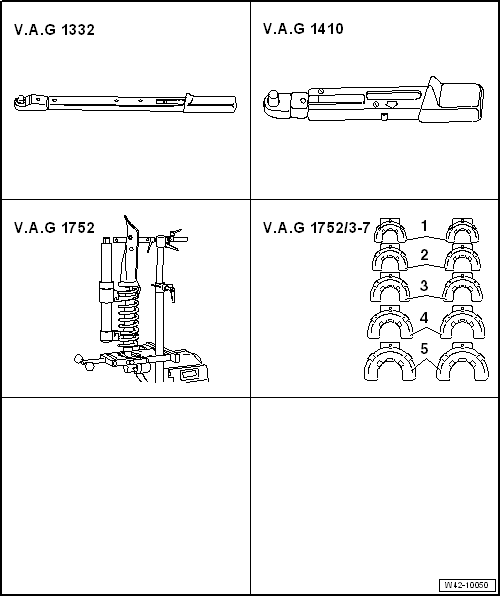
| Special tools and workshop equipment required |
| Torque wrench -V.A.G 1332- |
| Torque wrench -V.A.G 1410- |
| Spring compressor -V.A.G 1752/1- |
| Spring retainer -V.A.G 1752/3A- |
| Adapter -V.A.G 1752/9-, not illustrated |
| – |
Remove rear wheel housing liner
→ General body repairs, exterior; Rep. gr.66. |
| Vehicles with vehicle level sender |
|
|
|
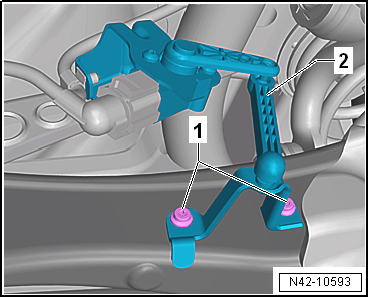
| – |
Remove retainer for rear left vehicle level sender-2-. |
| Vehicles with adaptive chassis control DCC |
|
|
|
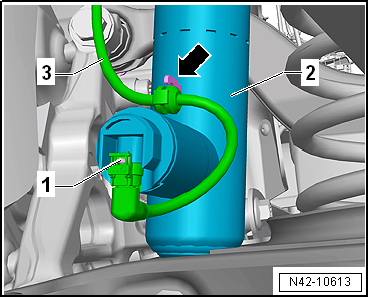
| – |
Disconnect connector -1- on
shock absorber -2-. |
| – |
Pull line -3- off shock
absorber -2--arrow-. |
 Note Note
| If there is moisture in the area of the connector, blow
compressed air on the contacts on the shock absorber and the
connector. |
| Continuation for all vehicles |
|
|
|
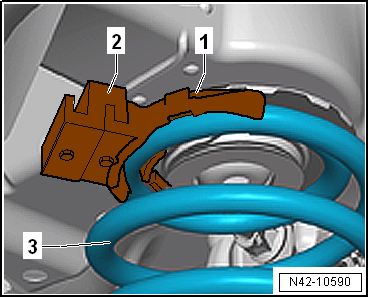
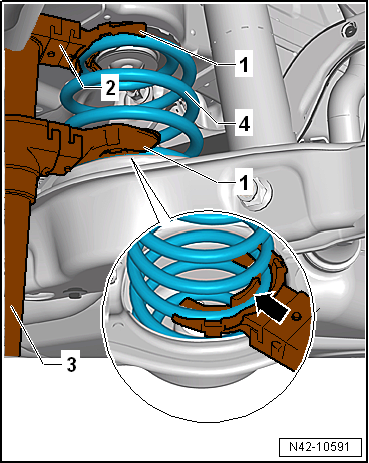
| – |
Fit spring retainer -V.A.G 1752/3A--1-
along with adapter -V.A.G 1752/9--2-
to uppermost spring coil -3-. |
|
|
|
| – |
Place spring compressor-3- on
adapter -V.A.G 1752/9--2-. |
| – |
Simultaneously insert lower spring retainer -V.A.G 1752/3A-
into spring -4-. |
| – |
Bolt spring compressor-3- to
adapter -V.A.G 1752/9--2-. |
| 1 - |
Spring retainer -V.A.G 1752/3A- |
| 2 - |
Adapter -V.A.G 1752/9- |
| 3 - |
Spring compressor -V.A.G 1752/1- |
 WARNING
| Ensure that coil spring is correctly seated in
spring retainer -V.A.G 1752/3A--arrow-
(risk of accident). |
|
| – |
Compress coil springs until load on shock absorber is
relieved. |
|
|
|
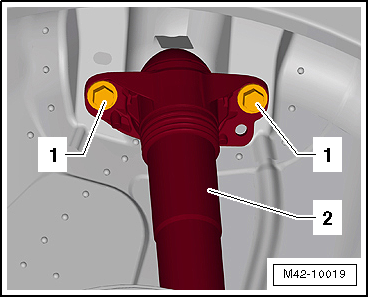
| – |
Unscrew bolts -1- for shock
absorber -2-. |
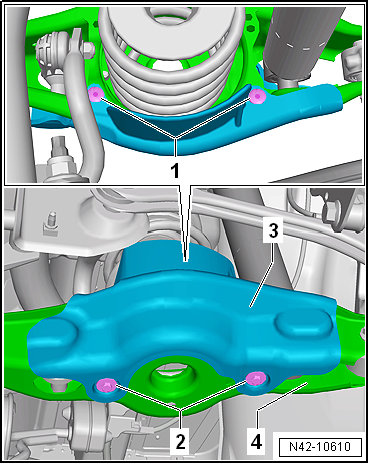
| Vehicles with stone guard |
|
|
|
| – |
Remove spreader rivet -1-. |
| – |
Unscrew bolts -2- for stone
deflector -3-. |
| – |
Remove stone guard -3- from
lower transverse link -4-. |
| Continuation for all vehicles |
|
|
|
| – |
Unscrew nut -1- and remove bolt
-2-. |
| Install in reverse order of removal, observing the
following: |
| The threaded connections of the shock absorber to the lower
transverse link may only be loosened and tightened in the
unladen weight position
→ Chapter. |
| – |
On vehicles with vehicle level sender, carry out basic
settings for wheel damper electronics → Vehicle
diagnostic tester. |
| → Chapter „Assembly overview - suspension strut, shock absorber,
spring, multi-link suspension“ |
| → Chapter „Assembly overview - transverse link“ |
| → Chapter „Torque settings for wheel bolts“ |
| Wheel housing liner
→ General body repairs, exterior; Rep. gr.66. |
|
|
 |
Special tools and workshop equipment required
Torque wrench -V.A.G 1332-
Torque wrench -V.A.G 1410-
Spring compressor -V.A.G 1752/1 ...
1 -
Shock absorber
Removing and installing
→ Chapter
Defective shock absorbers must always be degassed and drained before
...
© 2016-2024 Copyright www.vwgolf.org

 Removing and installing shock absorber, multi-link suspension, left shock
absorber
Removing and installing shock absorber, multi-link suspension, left shock
absorber Repairing shock absorber