Volkswagen Golf Service & Repair Manual: Removing and installing retaining plate for manually operated or automatic
anti-dazzle interior mirror, without rain and light sensor -G397- and front
camera for driver assist systems -R242
| |
Glass-metal adhesive kit “D 000 703 A1” |
| Special tools and workshop equipment
required |
| |
Glass scraper (commercially available)
-1- |
| |
Blade (commercially available) -2- |
|
|
|
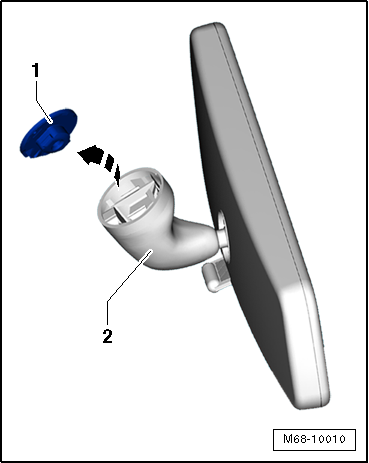
| – |
Detach retaining plate -1- from
mirror foot -2- in
-direction of arrow-. |
| – |
Remove PUR adhesive sealant from retaining plate
-1- using a wire brush. |
|
|
|
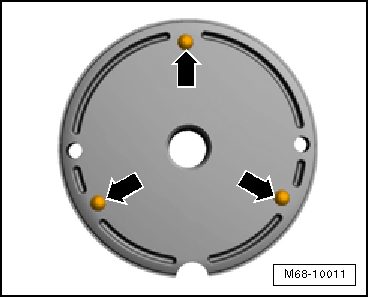
| – |
Grind off the three spacer protrusions
-arrows- on bonding surface. To do this, use sandpaper
(360/400 grain) laid on flat surface. |
| – |
Keep sanded surface clean and free of grease. |
| – |
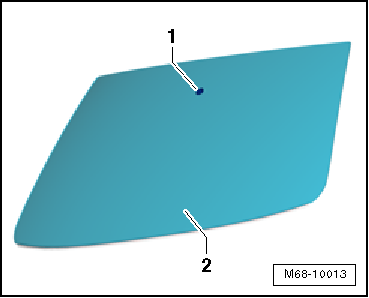
Remove PUR adhesive sealant as well as old glass/paint
primer down to ceramic layer on windscreen using a glass
scraper. |

Caution
| Do not damage ceramic coating. Scratches will remain
permanently visible. |
|
| – |
Clean adhesive contact area with adhesive remover -D 002 000
10- or cleaning solution -D 009 401 04-. |
|
|
|
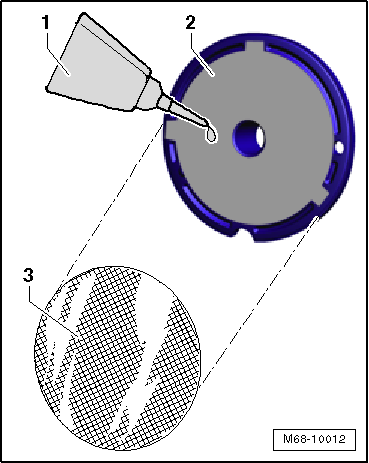
| – |
Press retaining plate -1- (do
not use force) against windscreen -2-
for 15 seconds. |
 Note Note
| Interior mirror can be installed after 15 minutes. |
|
|
|
Removing
–
Unclip front cover -1- from
front interior light -W1- and pull it downwards by approx. 10 mm
-arrows A-.
...
Note
With the repair procedure described, it is no longer
necessary to renew the windscreen.
...
© 2016-2024 Copyright www.vwgolf.org

 Removing and installing automatic anti-dazzle interior mirror, with rain and
light sensor -G397- and front camera for driver assist systems -R242-
Removing and installing automatic anti-dazzle interior mirror, with rain and
light sensor -G397- and front camera for driver assist systems -R242- Removing and installing retaining plate for manually operated anti-dazzle
interior mirror, with rain and light sensor -G397- and without front camera for
driver assist systems -R242-
Removing and installing retaining plate for manually operated anti-dazzle
interior mirror, with rain and light sensor -G397- and without front camera for
driver assist systems -R242-