Volkswagen Golf Service & Repair Manual: Removing and installing poly V-belt, vehicles without air conditioner
compressor
| Special tools and workshop equipment
required |
|
|
|
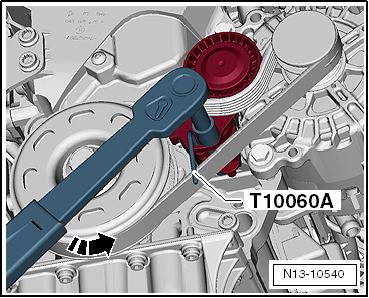
| – |
To slacken poly V-belt, turn tensioning device in
anti-clockwise direction -arrow-. |
| – |
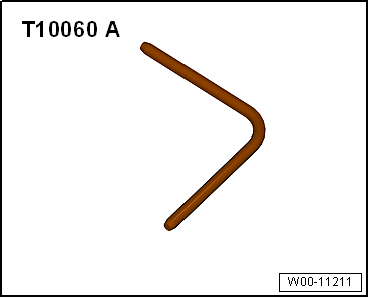
Lock tensioner in place with locking pin -T10060 A-. |
| – |
If poly V-belt is to be reinstalled, mark direction of
rotation on belt using chalk or felt tip pen before removing. |
| Installation is carried out in the reverse order; note the
following: |
|
|
|
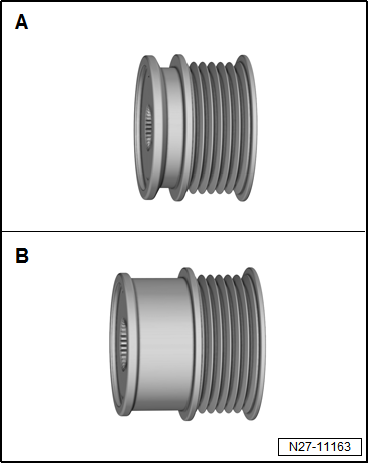
| Various versions of the overrunning alternator pulley,
-A- or -B-,
may be fitted depending on the type and version of alternator. |
|
|
|
| The length of the poly V-belt must be determined according
to the
→ Electronic Parts Catalogue depending on the version
of overrunning alternator pulley. |
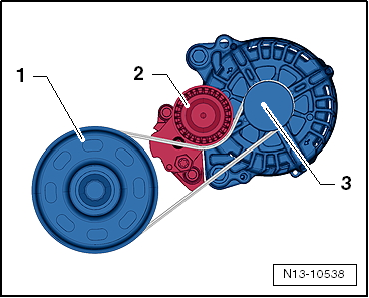
| – |
Fit poly V-belt as shown in illustration. |
| 2 - |
Tensioner for poly V-belt |
|
|
|
| – |
Turn tensioner in -direction of arrow-
and pull out locking pin -T10060 A-. |
| – |
Check that poly V-belt is properly seated. |
| – |
Start engine and check that poly V-belt runs properly. |
|
|
|
1 -
Bolt
Risk of damage to engine caused by incorrect valve timing.Do not turn crankshaft
out of TDC position.
Specified torque
→ Item
...
Special tools and workshop equipment
required
Locking pin -T10060 A-
Removing
...
Other materials:
Removing broken rear window
–
Protect body and interior from glass splinters.
–
Remove pieces of glass up to adhesive sealing material.
–
Pull off connections for rear window heating and aerial.
...
Removing and installing rear window
Note
The removal of a bonded window is described using the
Removal kit for flush bonded windows -V.A.G 1474 A-.
Alternatively, you can also use the cutting tool for bonded
windows -VAS 6452-.
...
Assembly overview - rear window
1 -
Rear window
Removing and installing
→ Chapter
2 -
PUR adhesive sealant
Cross section of bead: -width b- = 7 mm,
-height a- = 10 mm (including precoating,
residual material on window glass and w ...
© 2016-2024 Copyright www.vwgolf.org

 Assembly overview - sealing flange, belt pulley end
 Removing and installing poly V-belt, vehicles with air conditioner
compressor
Removing and installing poly V-belt, vehicles with air conditioner
compressor