Volkswagen Golf Service & Repair Manual: Removing and installing mounting bracket
| Special tools and workshop equipment
required |
|
|
|
 Note Note
| Removal and installation are described only for the right
door handle bracket. The right side is similar. |
|
|

Torque wrench -V.A.G 1783- |
| – |
Remove rear door trim
→ General body repairs, interior; Rep. gr.70. |
| – |
Remove inner door cover
→ Chapter. |
| – |
Remove door handle
→ Chapter. |
| – |
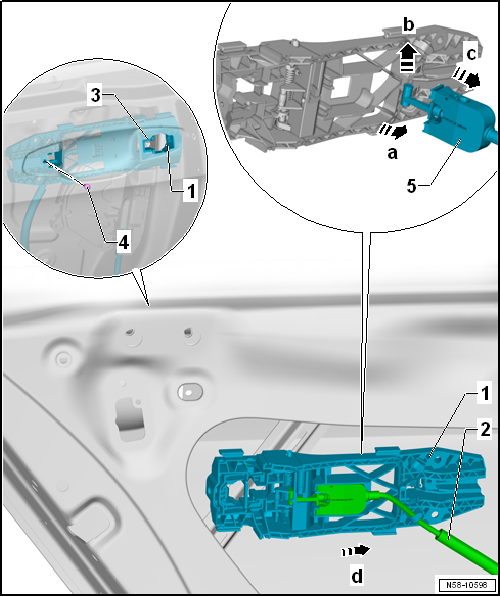
Unscrew bolt -4- and remove base
-3-. |
| – |
Push door handle bracket -1- slightly
towards rear, and remove it from door -arrow d-. |
| – |
Release holding device -5- and swivel
it out of mounting in door handle bracket -arrow
a-. |
| – |
Lift cable bolt out of mounting -arrow b-. |
| – |
Take cable -2- out of door handle
bracket -1--arrow c-. |
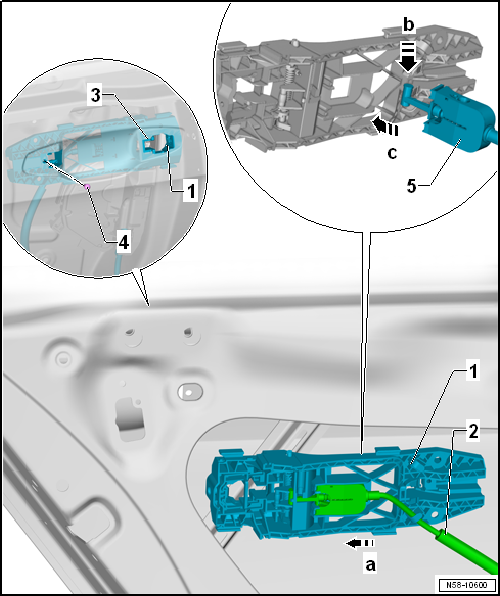
| – |
Insert cable -2- into door handle
bracket -1-. |
| – |
Push cable bolt into mounting -arrow b-. |
| – |
Swivel holding device -5- into mounting
of door handle bracket -arrow c- and
engage. |
| – |
Guide door handle bracket -1- into door
-arrow a-. |
| – |
Slightly push door handle bracket towards front. |
| – |
Insert base -3- and tighten bolts
-4-. |
| Further installation is performed in the reverse order of removal. |
| |
Door handle bracket
→ Chapter „Assembly overview - door handle and door lock“ |
Note
Removal and installation are described only for the right
door handle. The right side is similar.
Removing
...
Special tools and workshop equipment
required
Torque wrench -V.A.G 1331-
...
Other materials:
Changing gear using Tiptronic
Fig. 138 Selector lever in Tiptronic position
(left-hand drive). The controls are mirrored for right-hand drive vehicles
Fig. 139 Steering wheel with two paddles
for Tiptronic
First read and observe the introductory information
and safety warnings Using Tiptronic, the gears can be shifte ...
Assembly overview - fuel tank, vehicles with front-wheel drive and torsion
beam rear suspension
1 -
Cap
Screw in until engages audibly
Secured to tank flap unit by means of retaining strap.
2 -
Earth connection
For fuel filler neck
3 -
Bolt
Renew ...
Interior mirror
Fig. 92 On the windscreen: automatic anti-dazzle
interior mirror
Fig. 93 On the windscreen: manual anti-dazzle
interior mirror
First read and observe the introductory information
and safety warnings The driver must adjust the interior mirror to ensure
clear visibility through the rear ...
© 2016-2024 Copyright www.vwgolf.org

 Removing and installing door handle
 Removing and installing door lock