Volkswagen Golf Service & Repair Manual: Removing and installing lock carrier trim
| Special tools and workshop equipment
required |
|
|
|
| |
|
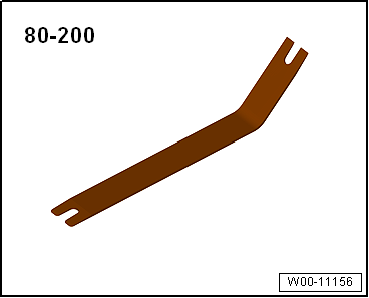
Removal lever -80 - 200 |
| Vehicles with towing bracket, saloon |
| – |
Remove luggage compartment floor towards rear. |
| – |
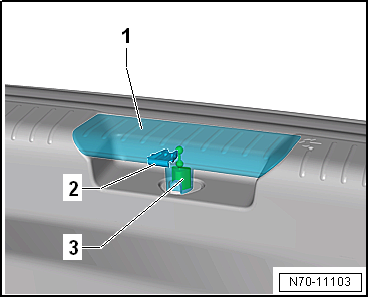
Release clip -2- on cable
end-piece -1-. |
| – |
Remove cable end-piece -1-
upwards from Bowden cable -3-. |
|
|
|
| Vehicles with towing bracket, estate |
| – |
Turn fasteners on left and right of luggage compartment
floor by 90° to release them, and remove luggage compartment
floor towards rear from vehicle. |
| – |
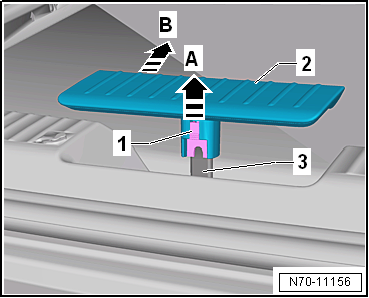
Release clip -1- on lever for
Bowden cable -2-, and push it
upwards -arrow A-. |
| – |
Remove lever for Bowden cable -2-
towards front from Bowden cable -3--arrow
B-. |
| Continued for all vehicles |
|
|
|
| – |
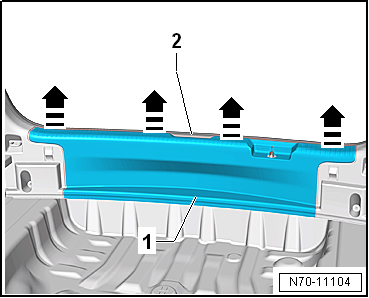
Pull off rear lid seal -2- in
area of lock carrier trim -1-. |
| – |
Release lock carrier trim -1-
in area of retaining clips from body mountings
-arrows- using removal lever -80 -
200-. |
| Vehicles with towing bracket |
| – |
Disconnect connector for trailer towing attachment locked
warning lamp -K226-. |
| Continued for all vehicles |
| – |
Remove lock carrier trim -1-
upwards. |
 Note Note
-
| |
Before installing, check all fasteners for damage and
renew if necessary. |
-
| |
Remove any retaining clips left in body mountings
using removal tool -T40280- and fit them in lock carrier
trim for installation. |
-
| |
Following installation, ensure that the lock carrier
trim is positioned in rear lid seal beading. |
| Installation is carried out in reverse order. |
|
|
 |
Removing
–
Open luggage compartment cover -1-
completely.
–
Fold down rear seat backrests.
...
Note
Removal and installation are described for the left vehicle
side. Follow same instructions for the right side as
appropriate.
...
Other materials:
Introduction
This chapter contains information on the following subjects:
→ Indicator lamp
→ Catalytic converter
→ Diesel particulate filter
Additional information and warnings:
Changing gear
Filling the tank
Fuel
Engine oil
Battery
Info ...
2-pack epoxy primer surfacer
Designation:
2-pack epoxy primer surfacer -LLS MAX 220 M1-, beige
(250 ml)
2-pack epoxy primer surfacer -LLS MAX 220 M2-, beige
(400 ml)
Issued 03.2013
...
Draining refrigerant circuit using air conditioner service station
WARNING
High-voltage on high-voltage system. Danger of
electric shock on air conditioner compressor!
Models with a high-voltage system: now de-energise
the high-voltage system
...
© 2016-2024 Copyright www.vwgolf.org

 Removing and installing luggage compartment cover
 Removing and installing rear shelf support