Volkswagen Golf Service & Repair Manual: Removing and installing high-level brake light, Golf
| Special tools and workshop equipment
required |
|
|
|
| – |
Switch off ignition and all electrical loads, and pull out
ignition key. |
 Caution
| Danger of damage to component surfaces. |
| When using leverage tools, mask visible areas of the
component with commercially available adhesive tape. |
|
|
|
|
| – |
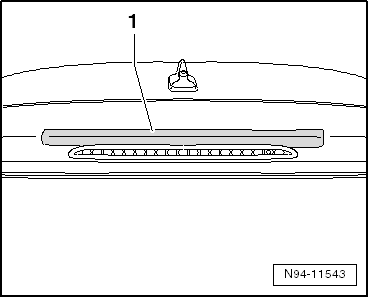
Attach a strip of adhesive tape -1-
to the area of the rear lid above the brake light. |
Caution
| Make sure the seal is not damaged when removing the
high-level brake light. |
|
|
|
|
| – |
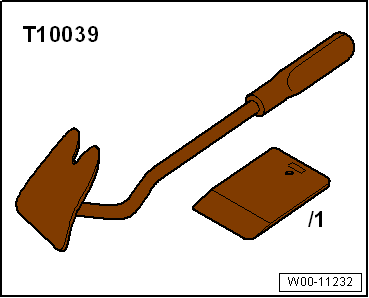
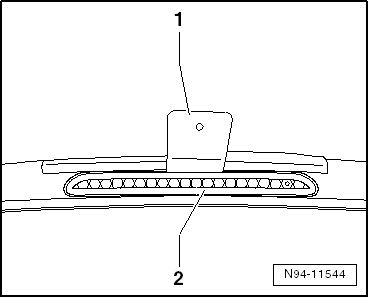
Insert wedge -T10039/1--1- at
top between high-level brake light -2-
and rear lid. |
| – |
Using plastic wedge -T10039/1--1-,
press high-level brake light -2-
downwards. |
| – |
Swing high-level brake light -2-
out of rear lid. |
|
|
|
| – |
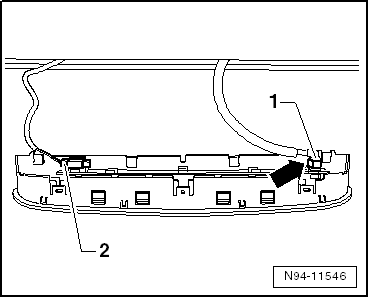
Pull out hose-locking device -arrow-. |
| – |
Pull hose connection -1- off
high-level brake light. |
| – |
Disconnect electrical connector -2-. |
| – |
Remove high-level brake light. |
 Note Note
| When installing high-level brake light, make sure seal is
correctly seated. The seal must not form loops or be damaged. |
| – |
Connect hose connection and connectors. |
| – |
Press high-level brake light into rear lid. |
| – |
Engage locking devices at top. |
| – |
Engage retaining springs at bottom. |
| – |
Check high-level brake light and rear window washer system
for fault-free function. |
|
|
 |
1 -
Bolt
Specified torque 2 Nm
2 -
Brake light connector
3 -
High-level brake light
W ...
Removing:
–
Remove roof spoiler
→ General body repairs, exterior; Rep. gr.66.
...
Other materials:
Removing and installing onboard supply control unit -J519-, LHD vehicles
Note
When renewing the control unit, select
Renew function for the respective control unit in
Guided fault finding or
Guided functions mode
→ Vehicle
diagnostic tester.
Removing
â ...
Special pliers with insert
The special pliers without insert -VAS 1978/1- with insert
for special pliers -VAS 1978/2- is part of the wiring harness
repair set -VAS 1978- and is used to crimp connectors during
wiring harness repairs.
...
Removing and installing front seat
Note
Removal and installation is described for the left
seat. Apply the same instructions for removal and
installation of the right seat as appropriate.
Removal and instal ...
© 2016-2024 Copyright www.vwgolf.org

 Assembly overview – high-level brake light, GTI, GTD and
»R«
Assembly overview – high-level brake light, GTI, GTD and
»R« Removing and installing high-level brake light, GTI, GTD and
»R«
Removing and installing high-level brake light, GTI, GTD and
»R«