Volkswagen Golf Service & Repair Manual: Removing and installing headlight dipped beam bulb (LED)
| Special tools and workshop equipment
required |
|
|
|
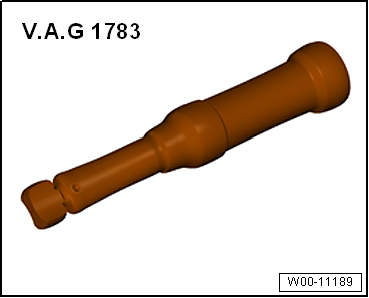
| Torque wrench -V.A.G 1783- |
|
|
|
| – |
Remove headlight
→ Chapter. |
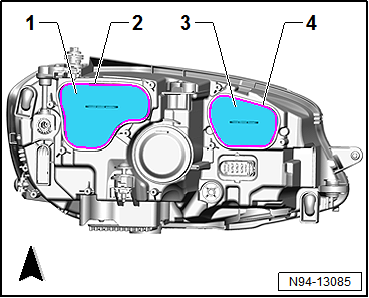
| – |
Using a hammer, carefully release housing cover
-1- along predetermined breaking
line -2-. |
| – |
Remove housing cover -1- from
headlight. |
|
|
|
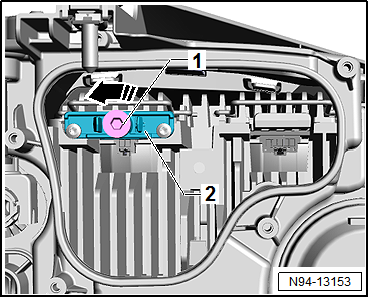
| – |
For fine adjustment, unscrew bolt -1-
completely from bracket -2--arrow-. |
|
|
|
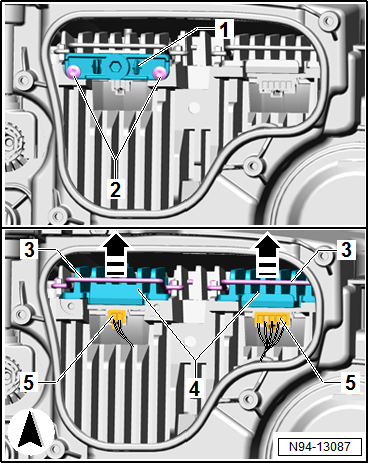
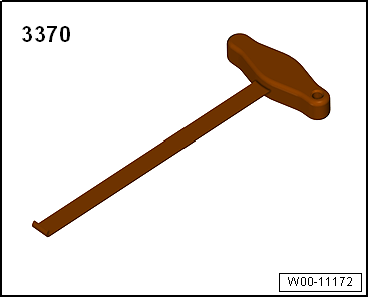
| – |
Release connectors -5- and pull
off. |
| – |
Using front-end hook -3370-, pull retaining clip
-3- slightly towards rear to
release. |
| – |
At the same time, swing retaining clip
-3- upwards -arrows-. |
| – |
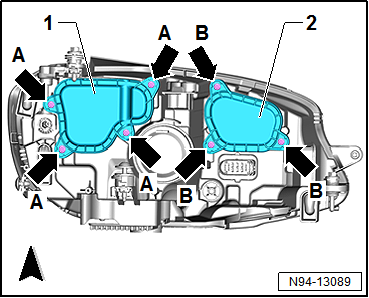
Remove LED modules for dipped beam headlight
-4- towards rear from headlight. |
|
|
|
| – |
Insert LED modules for dipped beam headlight
-4- into headlight, and fit them in
installation position. |
| – |
Swing retaining clips -3-
downwards in opposite -direction of
arrows-, and engage them audibly. |
| – |
Install bracket -1-, and
tighten bolts -2-. |
|
|
|
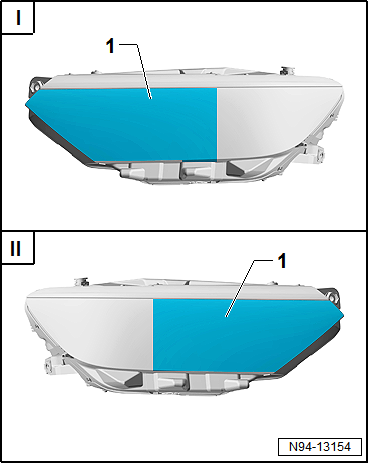
| – |
Position template -1- (
→ Electronic Parts Catalogue “ETKA”) relative to
contour on headlight lens, and fix it in place. |
| I - |
Alignment of template -1- on
front left headlight -MX1- |
| II - |
Alignment of template -1- on
front right headlight -MX2- |
| – |
Position headlight in horizontal position at a distance of 3
to 5 m in front of a white wall. |
| – |
Turn lateral adjustment screws on outside at top of
headlight to stop: |
| Turn towards right on front left headlight -MX1- (clockwise) |
| Turn towards left on front right headlight -MX2-
(anticlockwise) |
| – |
Connect connector for headlight in vehicle and connector on
removed headlight using adapter cable. |
| – |
Switch on light via rotary light switch -EX1-. |
|
|
|
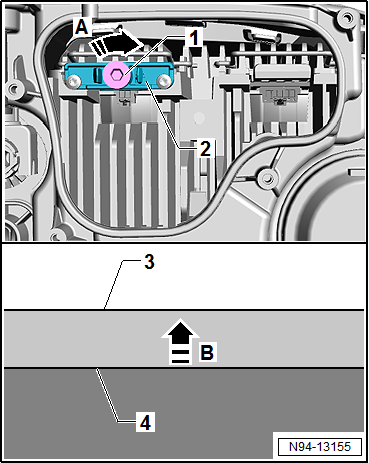
| Fine adjustment on front left headlight -MX1- |
| – |
For fine adjustment, slowly screw in bolt
-1- on bracket
-2--arrow A-. |
| This will cause the brighter area -4-
at bottom to travel upwards slowly -arrow
B-. |
| – |
Continue to slowly screw in bolt
-1--arrow A- until the upper edge
-4- of the brighter area and the upper edge
-3- of the darker area line up with
each other. |
|
|
|
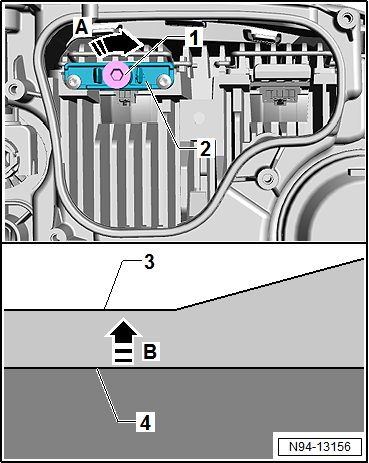
| Fine adjustment on front right headlight -MX2- |
| – |
For fine adjustment, slowly screw in bolt
-1- on bracket
-2--arrow A-. |
| This will cause the brighter area -4-
at bottom to travel upwards slowly -arrow
B-. |
| – |
Continue to slowly screw in bolt
-1--arrow A- until the upper edge
-4- of the brighter area and the horizontal edge
-3- of the darker area line up with
each other. |
| The darker area must remain visible on the right from the
inflexion point. |
|
|
|
| Continued for both headlights |
 Caution
| Risk of damage to the headlight. |
| Make sure the housing cover is correctly seated when
installing. The ingress of water will lead to permanent
damage to the headlight. |
|
| – |
Fit new housing cover -1- onto
headlight. |
| – |
Screw in and tighten bolts -arrows A-. |
| – |
Install headlight
→ Chapter. |
| – |
Check headlight setting and adjust headlight if necessary
→ Booklet36.1 |
| → Chapter „Assembly overview - LED headlights“ |
|
|
|
Note
Left headlight dipped beam bulb -M29- and right headlight
dipped beam bulb -M31- are only fitted on dual halogen
headlights.
...
Note
Removal and installation are described for the left side.
Removal and installation on the right side are carried out in
the same way.
...
Other materials:
Adjusting camber at front wheels
Special tools and workshop equipment
required
Torque wrench -V.A.G 1332-
Note
Camber correction is necessary only after body repairs.
Camber cannot be ad ...
Separating control unit from hydraulic unit
Special tools and workshop equipment
required
ESD workplace -VAS 6613-
Torx bit T25
If a control unit is defective, separate it from the
hydraulic unit and renew only the control ...
Removing and installing condensation drainage (LHD)
Removing
–
Remove right centre console trim in footwell
→ General body repairs, interior; Rep. gr.68.
Risk of damage to airbag control unit. Connectors may corrode if
moisture enters.After disconnecting, ...
© 2016-2024 Copyright www.vwgolf.org

 Note
Note
 WARNING
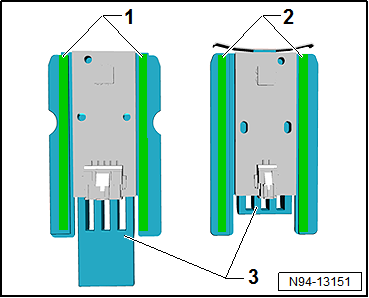
 Removing and installing headlight dipped beam bulb (dual halogen headlights)
 Removing and installing headlight main beam bulb -M30-/-M32- (dual halogen
headlights)
Removing and installing headlight main beam bulb -M30-/-M32- (dual halogen
headlights)