Volkswagen Golf Service & Repair Manual: Removing and installing centre console trim in footwell
 Note Note
|
|
|
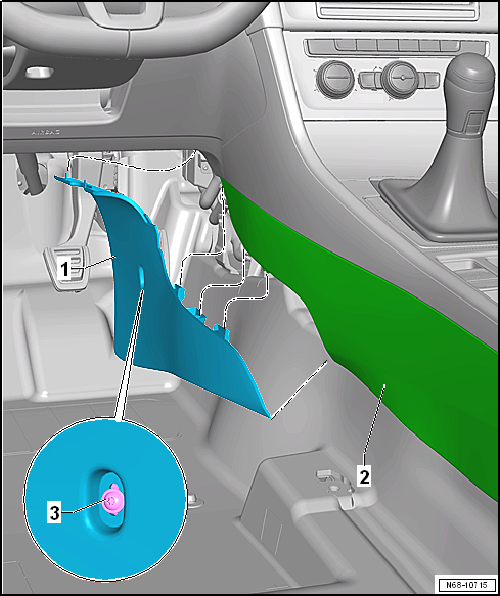
| – | Remove bolt -3-. |
| – | Pull centre console trim in footwell -1- downwards out of mountings in centre console -2- and remove it. |
Note
|
 Removing and installing rear centre console trim
Special tools and workshop equipment
required
Removing
–
Move front seat ...
 Removing and installing trim for operating and display unit
Removing
–
Starting at bottom, unclip trim for operating and display
unit -1- from operating and display
unit -2- and remove it.
...
Other materials:
Assembly overview - front wheel housing liner
Note
Minor differences may be encountered in respect of front
wheel housing liner, depending on vehicle model.
Only the left side is shown. The procedure for the right side
is similar.
1&nbs ...
Removing and installing brake caliper, FS III front brake
Special tools and workshop equipment
required
Torque wrench -V.A.G 1331-
Brake pedal actuator -V.A.G 1869/2-
...
Assembly overview - brake servo/brake master cylinder, RHD vehicles
Note
Only use new brake fluid conforming to VW standard (VW 501 14).
1 -
Cap
2 -
Brake fluid reservoir
With brake fluid level warning contact ...
