Volkswagen Golf Service & Repair Manual: Removing and installing catalytic converter
 Note Note
| The catalytic converter is removed together with the front
exhaust pipe. |
| Special tools and workshop equipment
required |
| High-temperature paste
→ Electronic Parts Catalogue. |
Note
| Reinstall all cable ties in the same locations when
installing. |
|
|
|
| – |
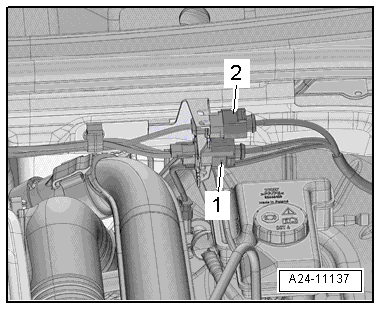
Detach electrical connectors -1-
and -2- from bracket, unplug
connectors and move electrical wiring clear. |
|
|
|
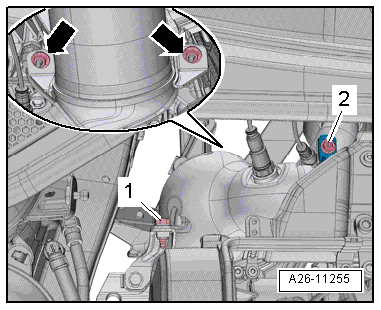
| – |
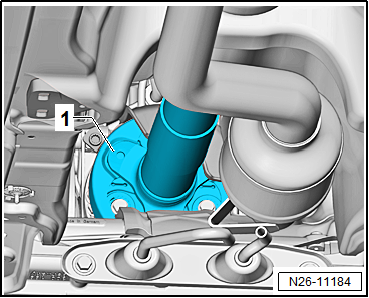
Unscrew bolt -2- and remove
screw-type clip. |
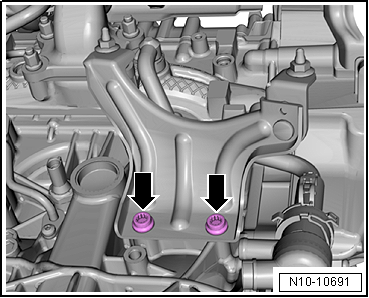
| – |
Remove bolt -1- and nuts
-arrows-. |
| Vehicles with engine preheater heater element -Z97- |
| – |
Unclip locking mechanism -arrow-. |
|
|
|
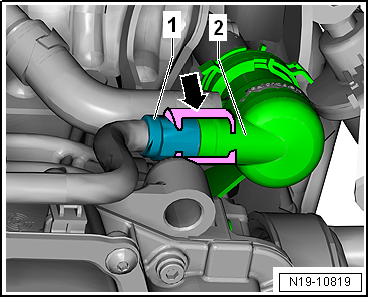
| – |
Pull off wiring -1- on engine
preheater heater element -Z97--2-. |
|
|
|
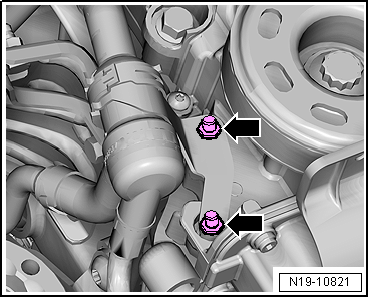
| – |
Unscrew nuts -arrows- and
remove engine preheating element -Z97- with bracket. |
| Continuation for all vehicles |
|
|
|
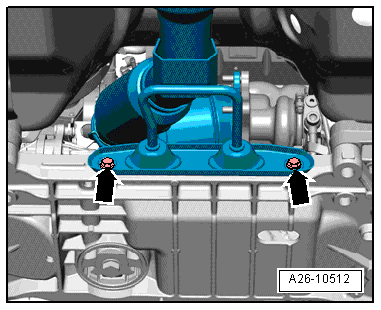
| – |
Unscrew bolts -arrows- of
bracket. |
|
|
|
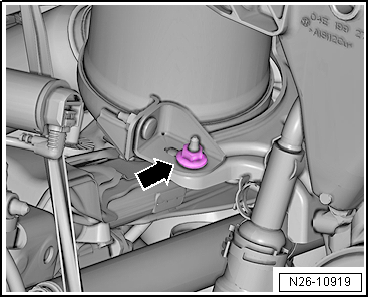
| – |
Unscrew right nut -arrow- of
bracket. |
|
|
|
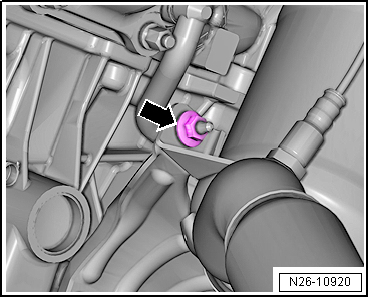
| – |
Unscrew nut -arrow- to the left
of the bracket. |
| – |
Remove tunnel cross-piece
→ General body repairs, exterior; Rep. gr.66. |
|
|
|
| – |
Detach connector from retainer and lay wire leading to
lambda probe to one side. |
|
|
|
| – |
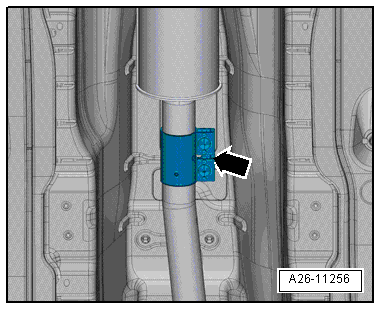
Loosen clamp -arrow- and push
it to rear. |
| Vehicles with four-wheel drive |
|
|
|
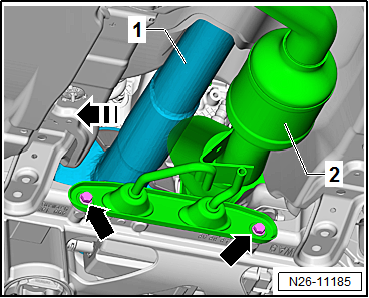
| – |
Unbolt flexible coupling of propshaft
-1- from bevel box
→ Final drive, differential; Rep. gr.39. |
|
|
|
| – |
Push propshaft -1- as far as
stop in direction of -arrow-. |
| – |
Remove catalytic converter with front exhaust pipe
-2- downwards. |
| Continuation for all vehicles |
|
|
|
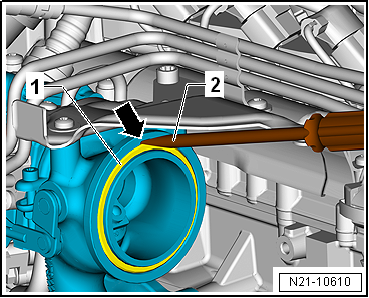
| – |
Fit screwdriver -2- in recess
-arrow- on turbocharger and lever
out seal -1-. |
| Installation is carried out in the reverse order; note the
following: |
Note
| Renew seal and self-locking nuts. |
| Coat studs and bolts of catalytic converter with
high-temperature paste; high-temperature paste
→ Electronic Parts Catalogue. |
| – |
Aligning exhaust system free of tension
→ Chapter. |
| → Fig. „“Installing catalytic converter - tightening torque and
sequence”“ |
| → Chapter „Assembly overview - emission control“ |
| → General body repairs, exterior; Rep. gr.66 |
|
|
|
1 -
Bolt
20 Nm
2 -
Bracket
Renew if damaged
3 -
Nut
Specified t ...
Other materials:
Removing and installing central locking SAFELOCK function warning lamp -K133
Removing
–
Remove front door trim panel
→ General body repairs, interior; Rep. gr.70.
–
Unclip central locking SAFELOCK function warning lamp ...
Introduction
This chapter contains information on the following subjects:
→ Warning and indicator lamps
→ Information on steering
The power steering is not hydraulic. It is an electromechanical system. The advantage
of this steering system is that no hydraulic hoses, hydraulic oil, p ...
Removing and installing brake caliper PC57
Special tools and workshop equipment
required
Removal wedge -3409-
Piston resetting appliance -T10145-
Re ...
© 2016-2024 Copyright www.vwgolf.org

 Assembly overview - emission control