Volkswagen Golf Service & Repair Manual: Removing and installing brake pads or linings
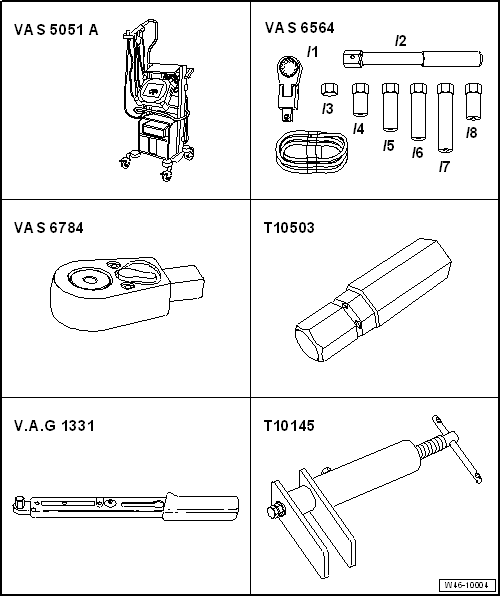
| Special tools and workshop equipment required |
| Vehicle diagnosis, testing and information system -VAS 5051- |
| Tool set for brake bleeding -VAS 6564- |
| Insert tool with ratchet -VAS 6784- |
| Bit attachment (7 mm) -T10503- |
| Torque wrench -V.A.G 1331- |
| Piston resetting appliance -T10145- |
 Note Note
| The installation position of the brake caliper depends on
the rear axle. The removal and installation procedures change
only slightly, but additional tools are required. |
|
|
|
| Installation position of brake caliper, torsion beam axle: |
|
|
|
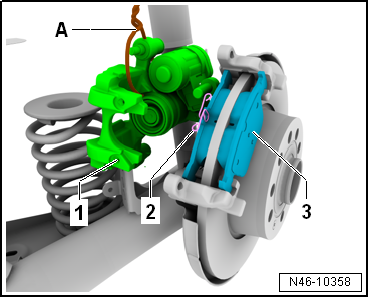
| – |
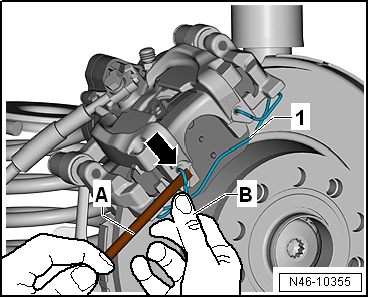
Use a screwdriver -A- to lever
retaining spring -1- for brake pads
out of brake caliper -arrow- while
supporting retaining spring with the other hand. |
|
|
|
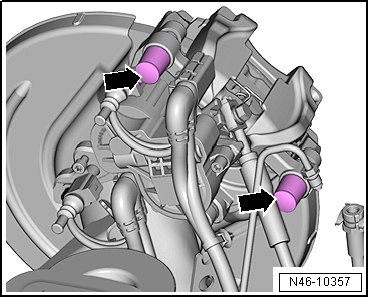
| – |
Remove cover caps -arrows-. |
|
|
|
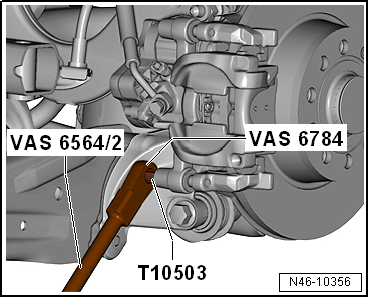
| – |
Unscrew both guide pins from brake caliper using 7 mm bit
-T10503- and insert tool with ratchet -VAS 6784-. |
|
|
|
| – |
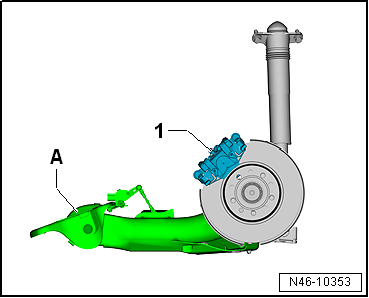
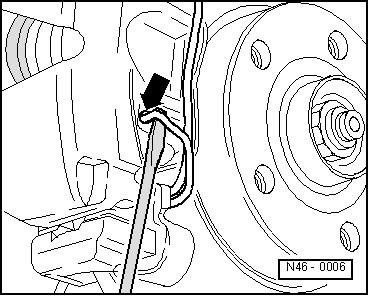
Remove brake caliper -1- and
secure it with wire -A- so that
weight of brake caliper does not strain or damage brake hose. |
Note
| It is essential that the pistons are reset using
→ Vehicle
diagnostic tester. The thrust nut in the piston is
fitted on a floating bearing, so that the piston can only be
pressed but not pulled back. Only the spindle with the thrust
nut will be moved back. |
| The piston must be reset beforehand with
→ Vehicle
diagnostic tester. |
|
|
|
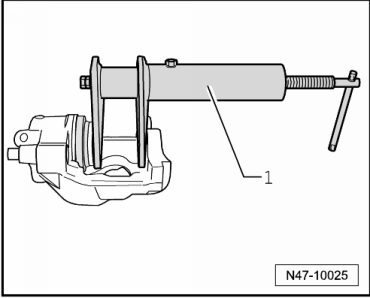
| – |
Press piston back fully using piston resetting appliance
-T10145-. |
|
|
|
| – |
Remove brake pads -2 and 3-. |
| Do not blow out brake system with compressed air; the
resulting dust constitutes a health hazard! |
| – |
Thoroughly clean contact surfaces for brake pads on brake
carrier and remove any corrosion. |
Note
| Use only methylated spirits for cleaning the brake caliper
housing. |
|
|
|
| – |
Insert inner brake pad -2- and
outer brake pad -3- into brake
carrier. |
|
|
|
| – |
Insert cover caps -arrows-. |
|
|
|
Assembly overview - rear brakes:
Note
Use the brake filling and bleeding equipment -VAS 5234- to
draw off brake fluid from the b ...
Special tools and workshop equipment required
Vehicle diagnosis, testing and information system -VAS 5051-
Tool set for brake bleeding -VAS 6564-
...
Other materials:
Assembly overview - dash panel insert
1 -
Electrical connector
For dash panel insert
2 -
Dash panel insert -KX2-
With control unit in dash panel insert -J285-.
Dash panel insert must be renewed if warning lamp LED or
illumination ...
Repairing trailing arm
Special tools and workshop equipment required
Tube for wheel bearing -3345-
Assembly tool -3346-
Thrust plate -VW 402-
Press tool -VW 412-
Thrust piece -T10496-
–&n ...
Notes on treating corroded fold areas
Examples for corrosion in the fold area of bonnet, door or
rear lid
–
Remove corrosion using
→ Chapter „Pneumatic brush grinder set -VAS 6446-“ or
→ Chapter „Brush grinder set -VAS 6776-“.
...
© 2016-2024 Copyright www.vwgolf.org

 Assembly overview - rear brakes
 Removing and installing brake caliper