Volkswagen Golf Service & Repair Manual: Removing and installing brake pads or linings
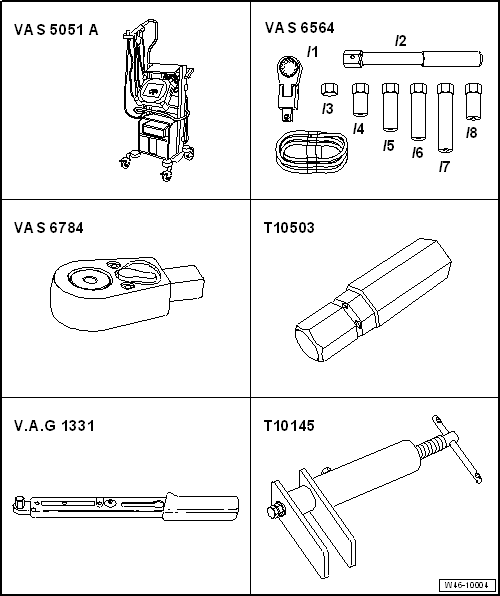
| Special tools and workshop equipment required |
| Vehicle diagnosis, testing and information system -VAS 5051- |
| Tool set for brake bleeding -VAS 6564- |
| Insert tool with ratchet -VAS 6784- |
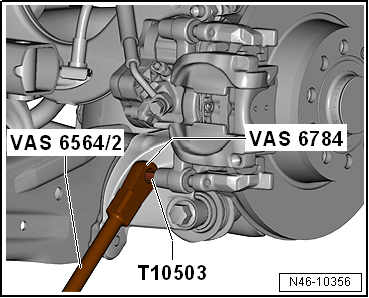
| Bit attachment (7 mm) -T10503- |
| Torque wrench -V.A.G 1331- |
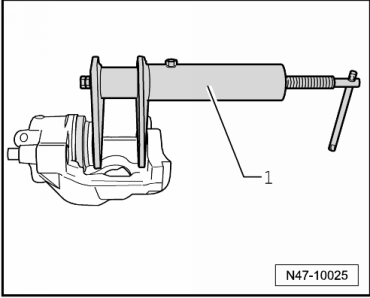
| Piston resetting appliance -T10145- |
 Note Note
| The installation position of the brake caliper depends on
the rear axle. The removal and installation procedures change
only slightly, but additional tools are required. |
|
|
|
| Installation position of brake caliper, torsion beam axle: |
|
|
|
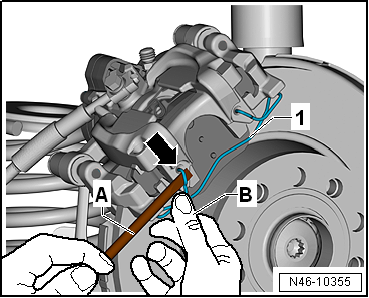
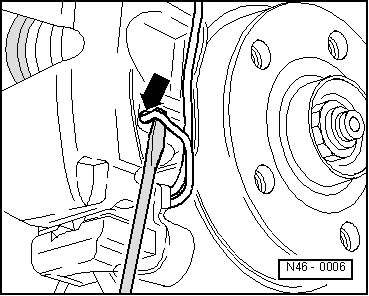
| – |
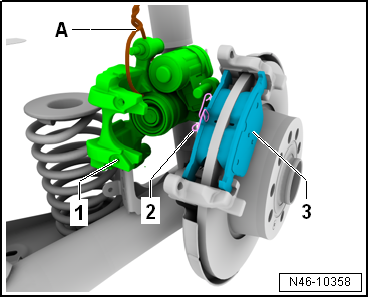
Use a screwdriver -A- to lever
retaining spring -1- for brake pads
out of brake caliper -arrow- while
supporting retaining spring with the other hand. |
|
|
|
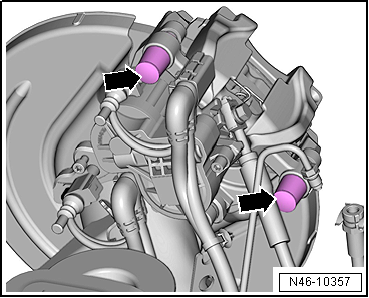
| – |
Remove cover caps -arrows-. |
|
|
|
| – |
Unscrew both guide pins from brake caliper using 7 mm bit
-T10503- and insert tool with ratchet -VAS 6784-. |
|
|
|
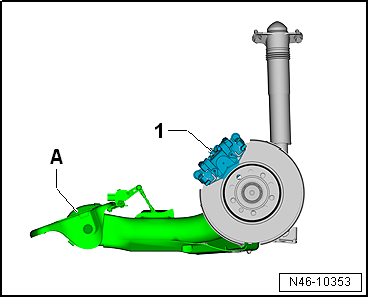
| – |
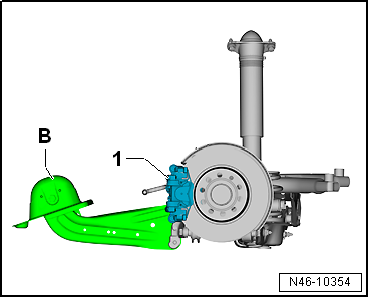
Remove brake caliper -1- and
secure it with wire -A- so that
weight of brake caliper does not strain or damage brake hose. |
Note
| It is essential that the pistons are reset using
→ Vehicle
diagnostic tester. The thrust nut in the piston is
fitted on a floating bearing, so that the piston can only be
pressed but not pulled back. Only the spindle with the thrust
nut will be moved back. |
| The piston must be reset beforehand with
→ Vehicle
diagnostic tester. |
|
|
|
| – |
Press piston back fully using piston resetting appliance
-T10145-. |
|
|
|
| – |
Remove brake pads -2 and 3-. |
Health hazard due to poisonous dust coming out of brake system.Risk of
irreversibly deposited dust particles in the lungs. Risk of respiratory
health problems.Never blow out the brake system with compressed air.
| – |
Thoroughly clean brake carrier and contact surfaces for
brake pads and remove corrosion. |
Note
| Use only methylated spirits for cleaning the brake caliper
housing. |
| Install in reverse order of removal, observing the
following: |
|
|
|
| – |
Insert inner brake pad -2- and
outer brake pad -3- into brake
carrier. |
|
|
|
| – |
Insert cover caps -arrows-. |
|
|
|
Assembly overview - rear brakes:
Note
Use the brake filling and bleeding equipment -VAS 5234- to
draw off brake fluid from the b ...
Special tools and workshop equipment required
Vehicle diagnosis, testing and information system -VAS 5051-
Tool set for brake bleeding -VAS 6564-
...
Other materials:
Overview of fitting locations - components not located in passenger
compartment, Golf LHD
1 -
Exhaust ventilation for passenger compartment
Checking
→ Chapter
Removing and installing
→ Chapter
2 -
Ambient temperature sensor -G17-
Removing and installing
...
Overview of the menu structure
First read and observe the introductory information
and safety warnings The following menu structure shows how the Volkswagen
information system menus in the instrument cluster display are structured. The size
and layout of the Volkswagen information system menu depends on the vehicle electr ...
Assembly overview - sliding sunroof
1 -
Glass panel for panorama tilting sunroof (single pane safety glass)
Removing glass panel
→ Chapter
If drive defective, remove glass panel
→ Chapter
Adjusting glass panel
→ Chapter
2 -
Bolt
...
© 2016-2024 Copyright www.vwgolf.org

 Rear brakes
 Removing and installing brake caliper