Volkswagen Golf Service & Repair Manual: Assembly overview - B-pillar trim
 Note Note
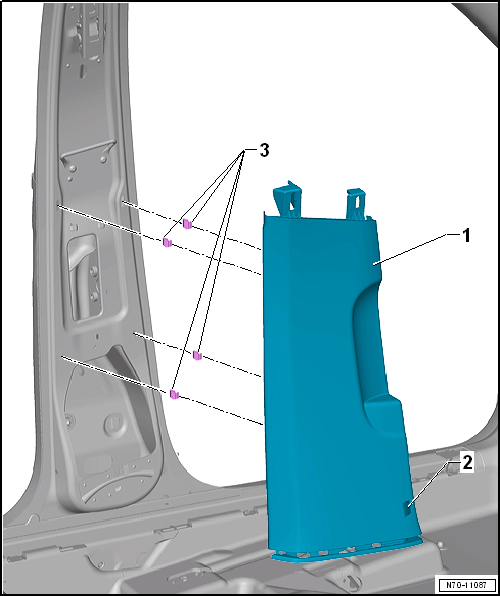
| The illustration shows the B-pillar trims on the left side.
The right-hand side is similar (mirror image of left-hand side). |
|
|
|
| Upper part of B-pillar trim |
| I: Upper B-pillar trim, 4-door model |
| II: Upper B-pillar trim, 2-door model |
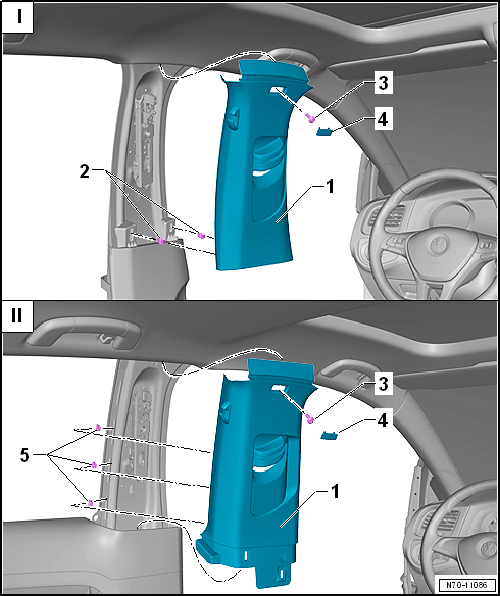
| 1 - |
Upper part of B-pillar trim |
- Removing and installing
→ Chapter
- Insert in upper B-pillar trim
- Renew any damaged or deformed retaining clips
- With “airbag” symbol.
- Insert in B-pillar trims.
- Renew any damaged or deformed retaining clips
- Removing and installing
→ Chapter
| 2 - |
Button for deactivating interior monitoring and vehicle inclination
sensor -E616- |
- Removing and installing
→ Electrical system; Rep. gr.96
- Insert into trim
- Remove any retaining clips left in body mountings using removal tool
-T40280-
- Renew any damaged or deformed retaining clips.
Note
The illustration shows the A-pillar trims on the left side.
The right-hand side is similar (mirror image of left-hand side).
...
Note
The illustration shows the D-pillar trim on the left side. The
right-hand side is similar (mirror image of left-hand side).
1 -
D-pillar tri ...
Other materials:
Removing and installing washer fluid reservoir, »R«
Special tools and workshop equipment
required
Drip tray
Removing
–
Remove front right wheel
→ Running gear, axles, steering; Rep. gr.44.
â ...
Vehicle key
Fig. 22 Vehicle key
Fig. 23 Vehicle key with alarm button
First read and observe the introductory information
and safety warnings Vehicle key
The key can be used to lock and unlock the car from a distance   .
The remote control transmitter and the battery are integrated in the key. The ...
Assembly overview - rear brakes
Assembly overview - rear brakes:
Note
Use the brake filling and bleeding equipment -VAS 5234- to
draw off brake fluid from the brake fluid reservoir.
Before removing a brake caliper or disconnecting ...
© 2016-2024 Copyright www.vwgolf.org

 Assembly overview - A-pillar trim
 Assembly overview - D-pillar trim